1.1.1 Installation on PrestaShop 1.4
First, connect to your PrestaShop Back Office.
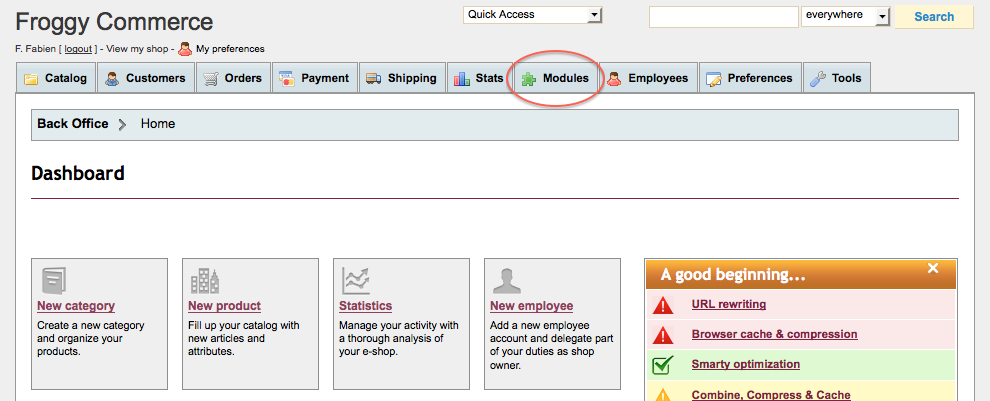
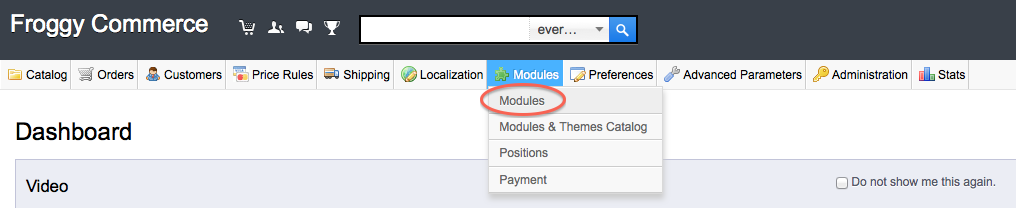
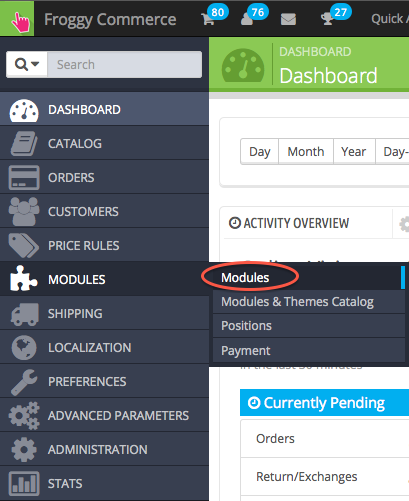
Once connected, go to the “Modules” section.
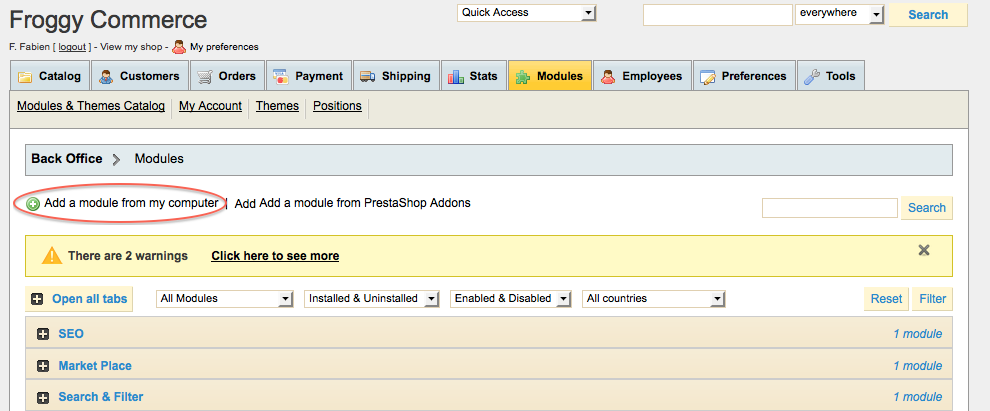
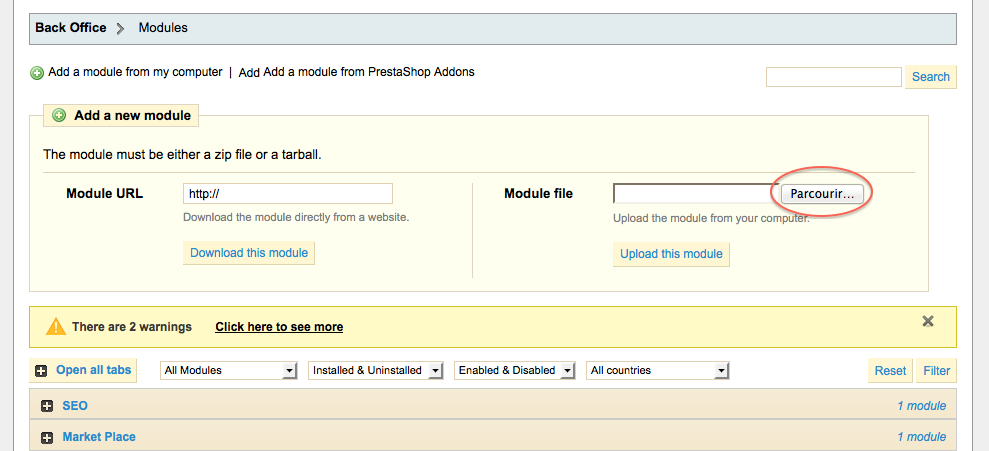
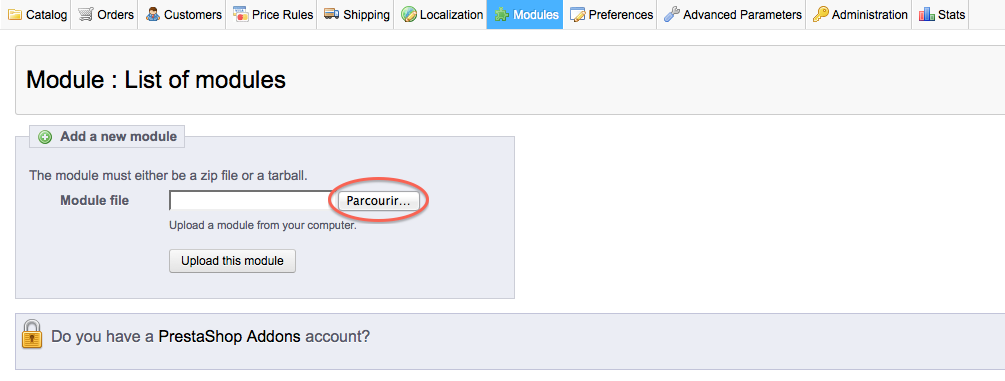
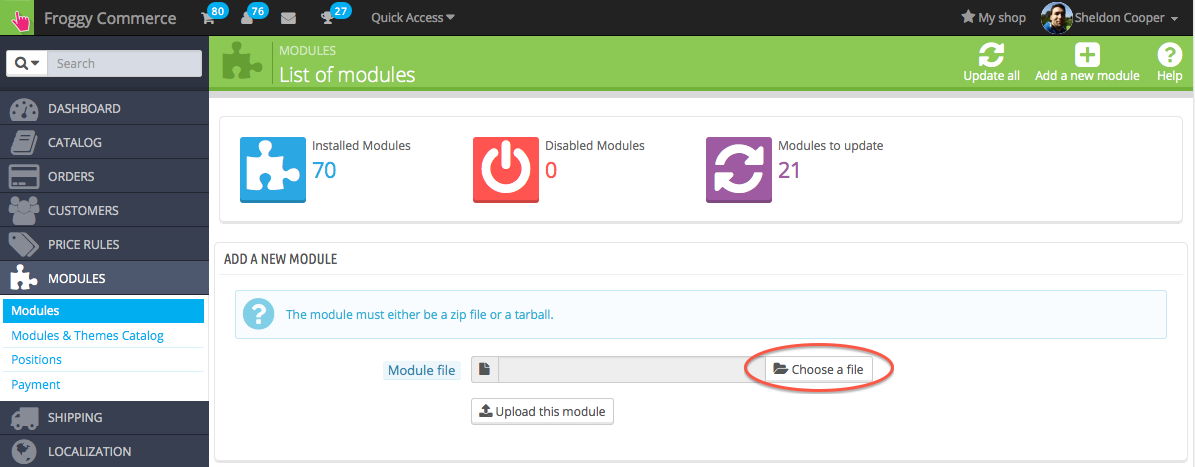
We provided you a file named “froggypricenegociator.zip”. You will have to upload it in your module section. To do so, click on the “Add a new module” button.
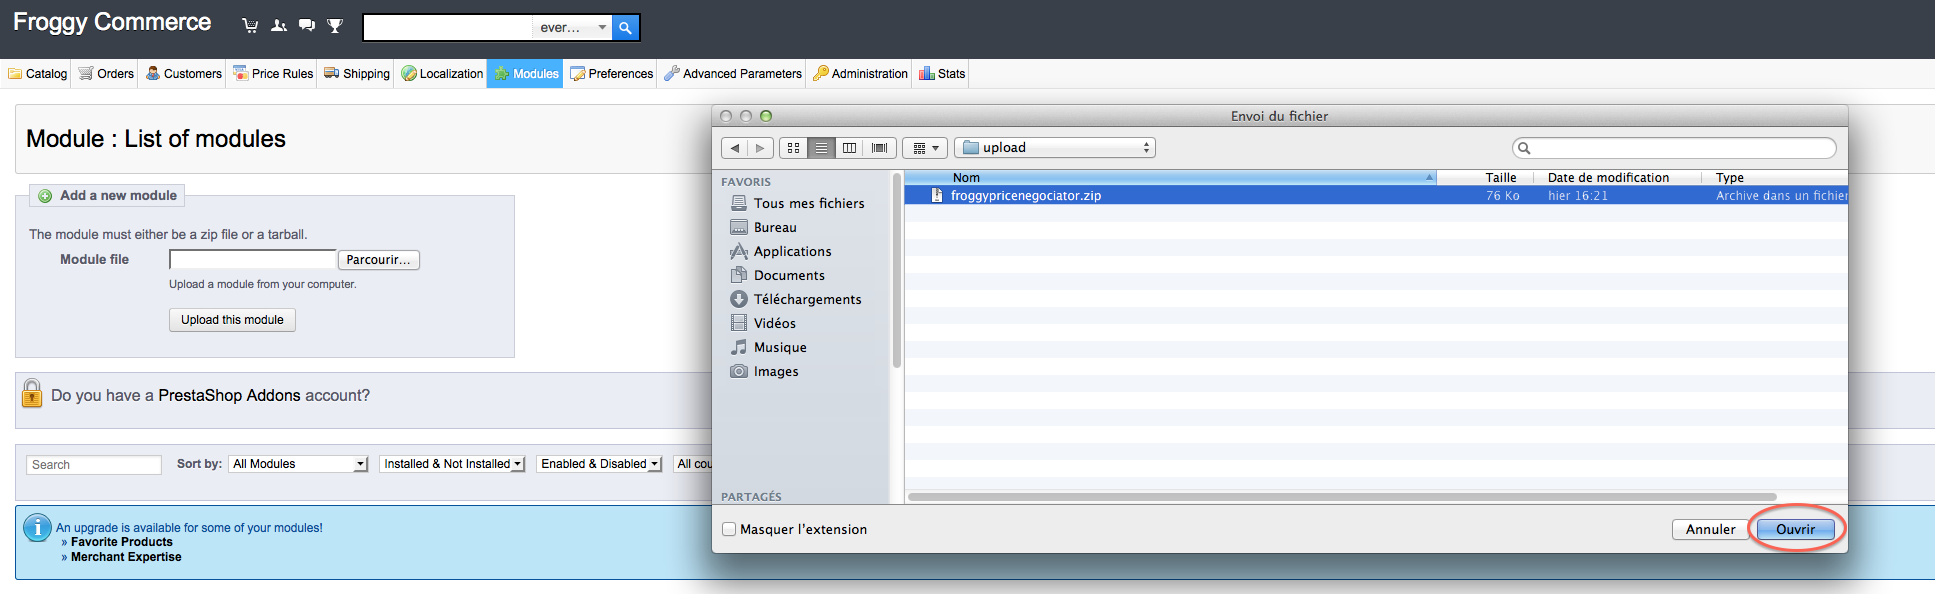
A new tab should have appeared, click on the “browse” button.
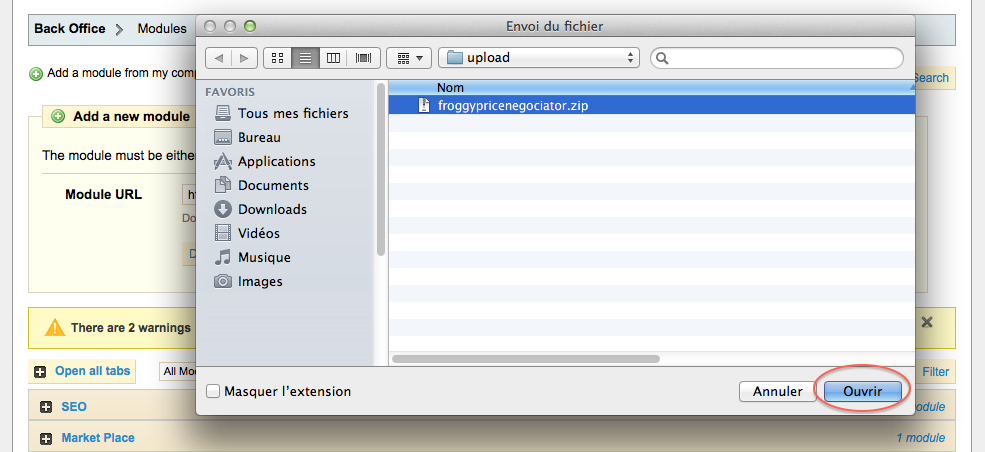
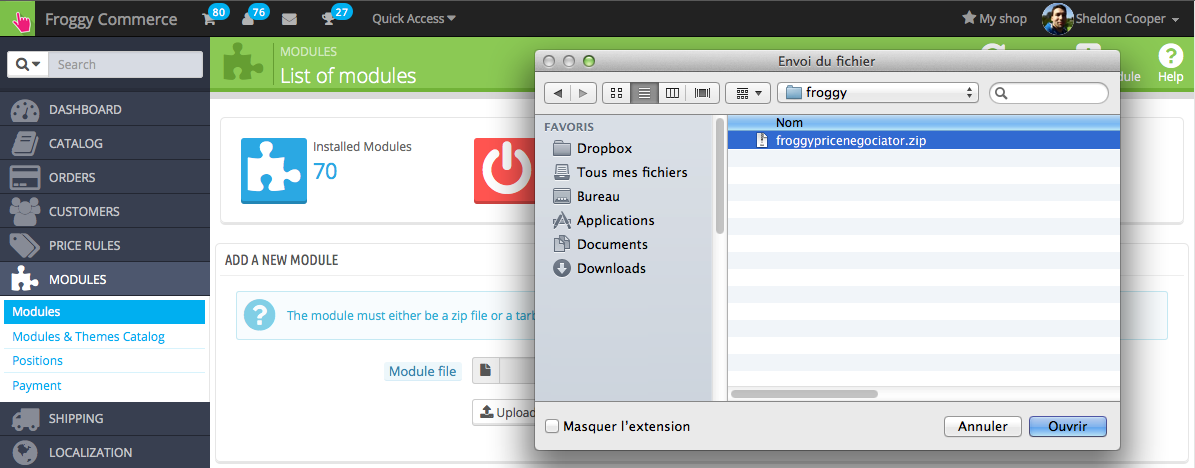
Then select the file “froggypricenegociator.zip” and click on “open”.
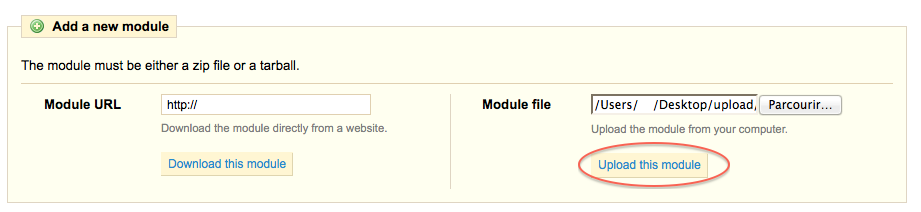
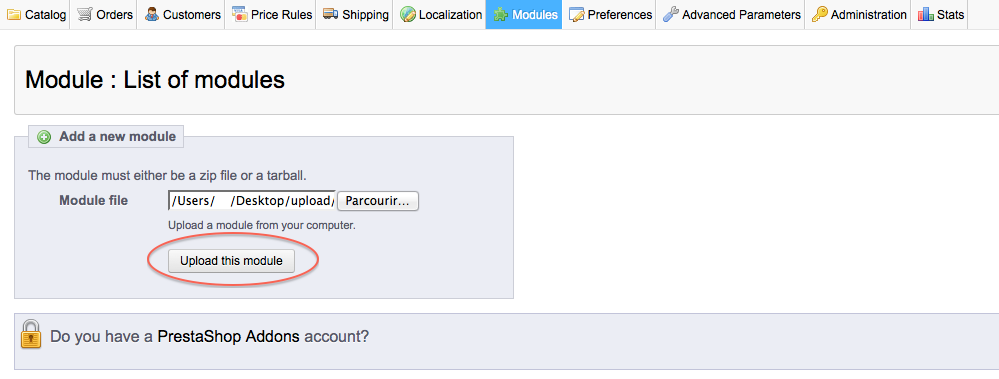
And finally, click on the button “Upload this module”.
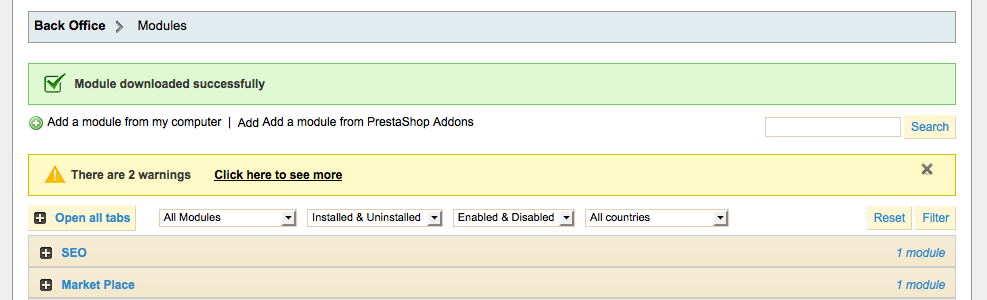
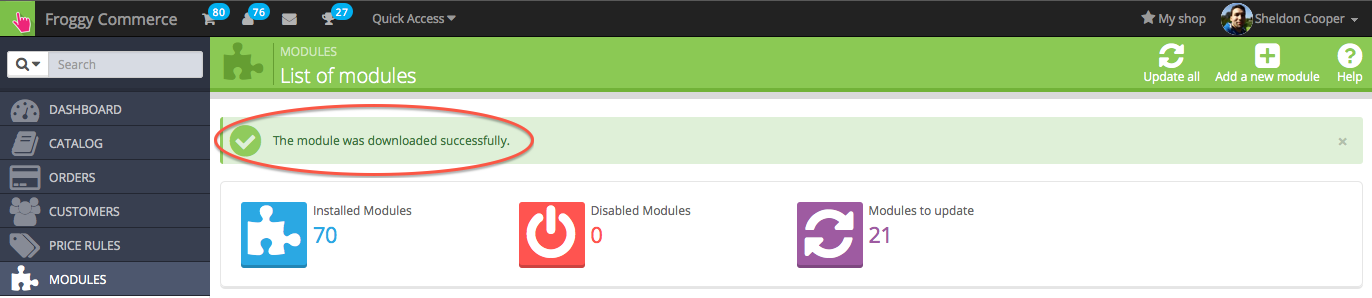
A confirmation message “Module downloaded successfully” should appear.
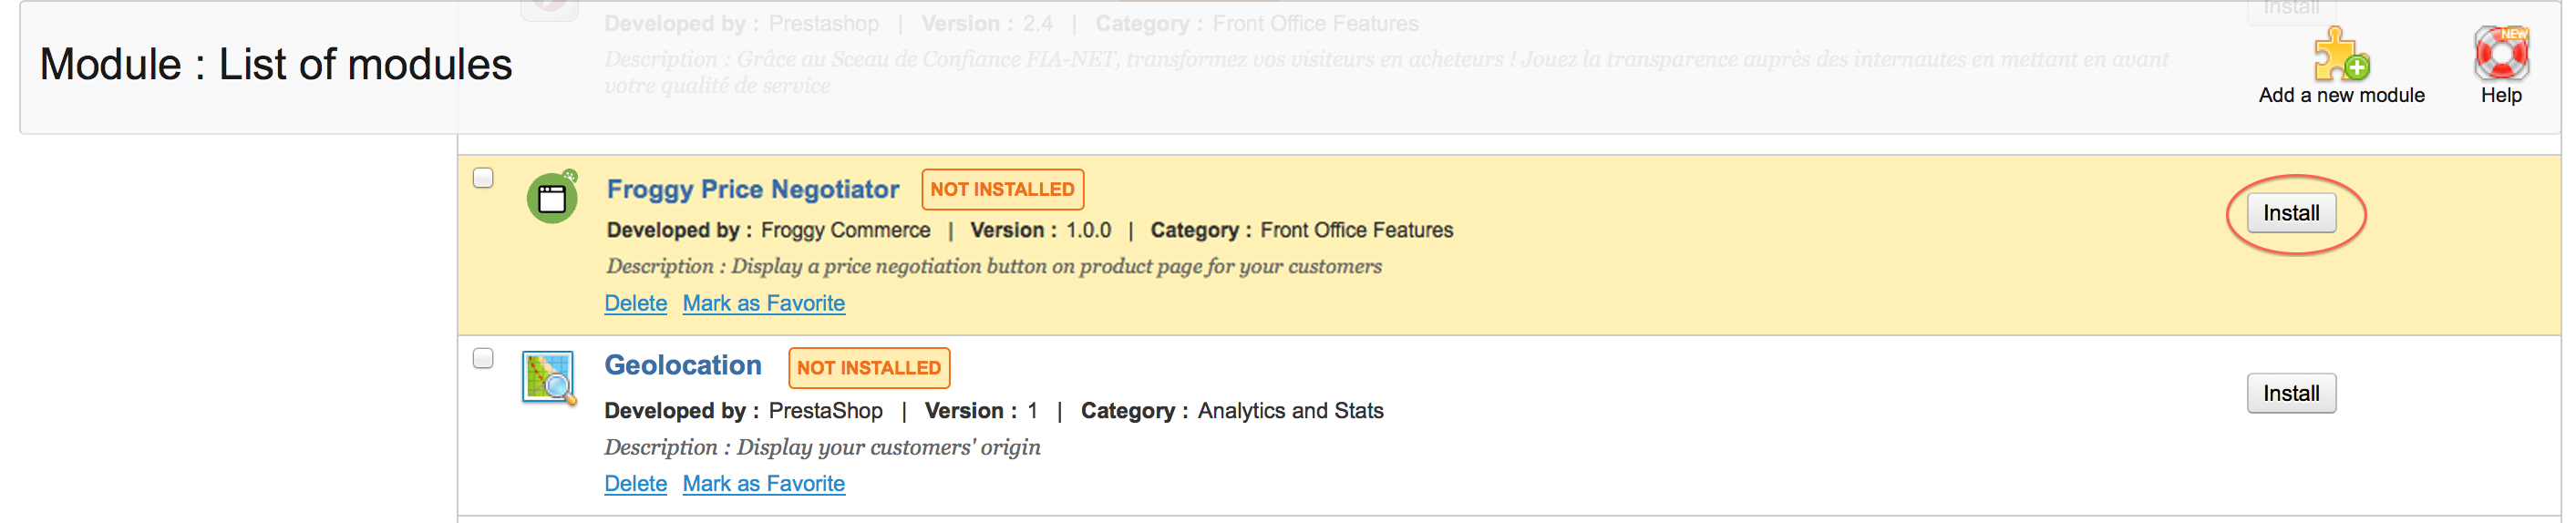
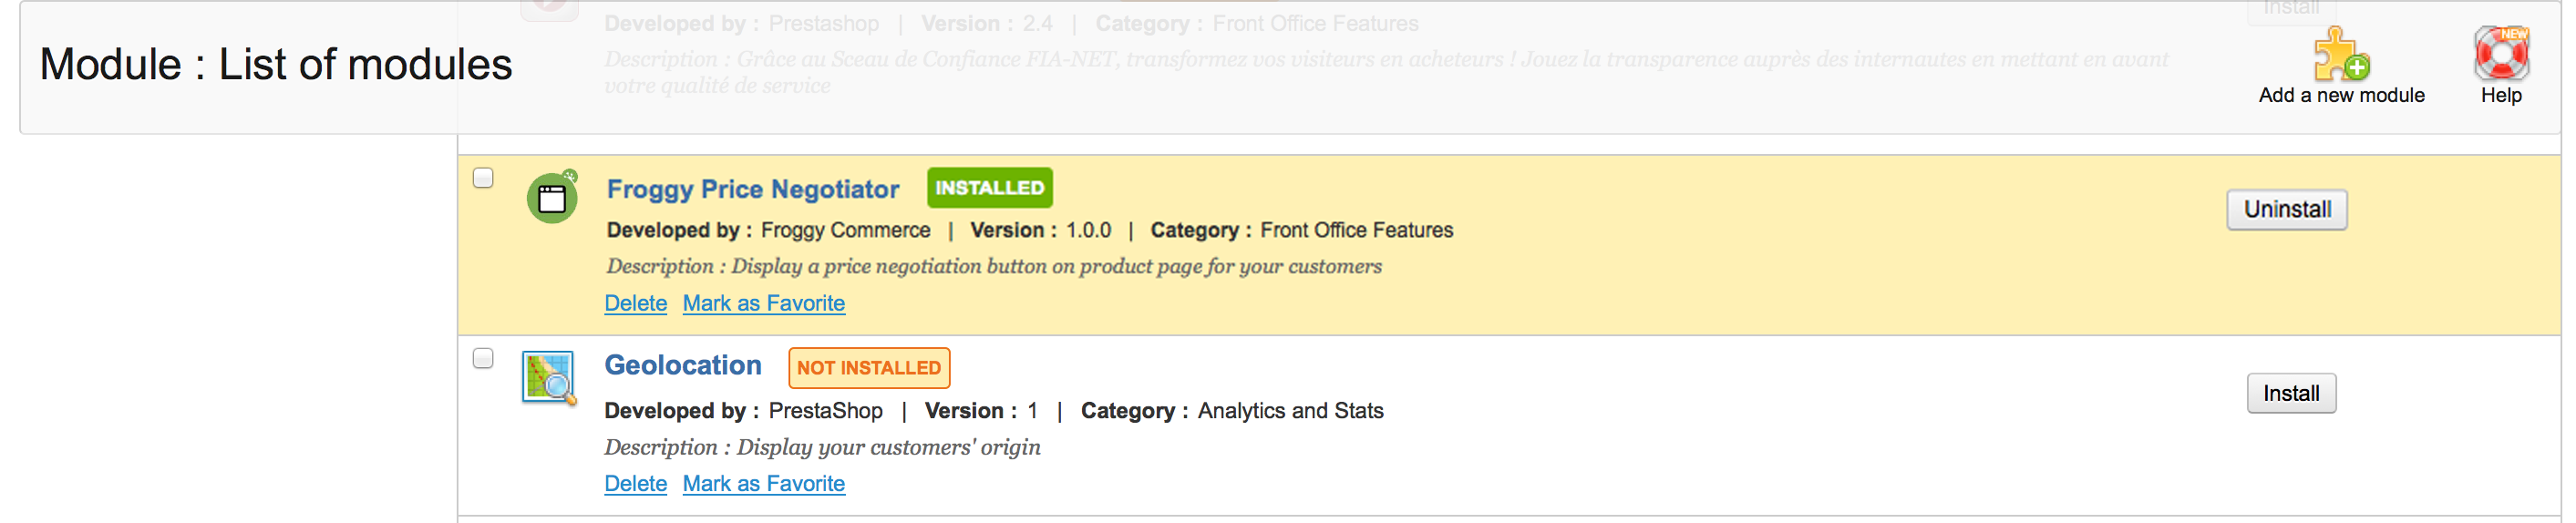
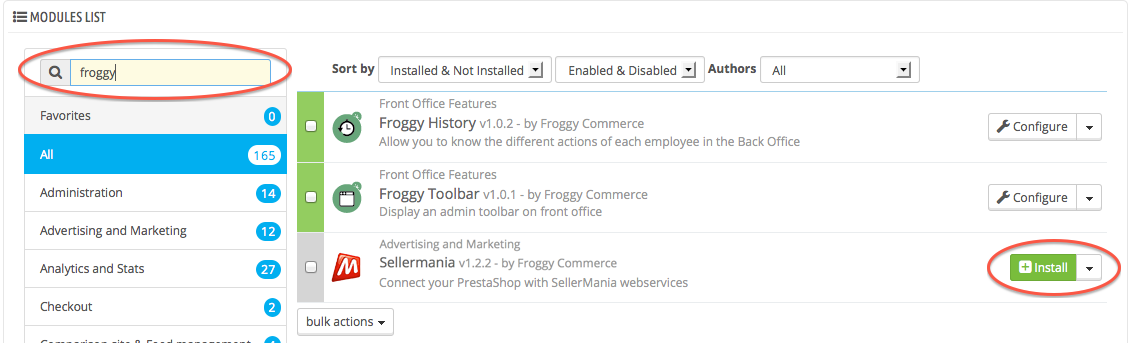
Click on the “Front Office Features” and search for the module “Froggy Price Negotiator” or use the search filter by typing “Froggy Price Negotiator” in it, then click on the “Install” button.
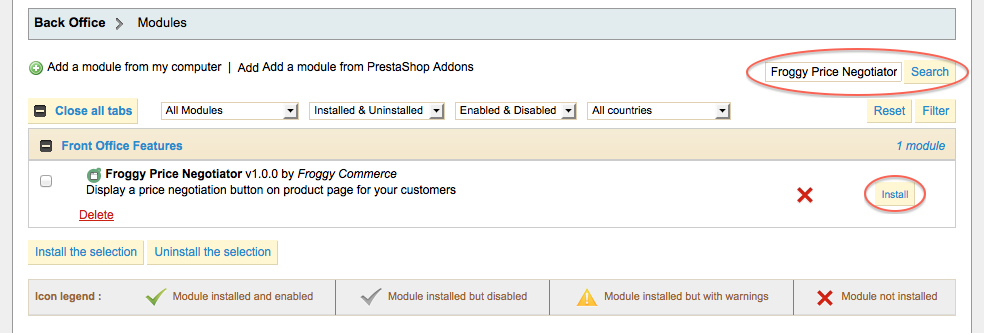
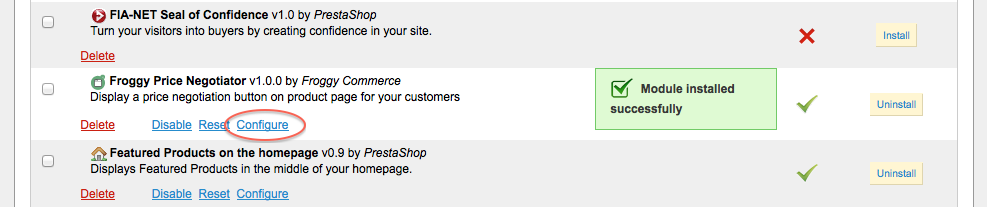
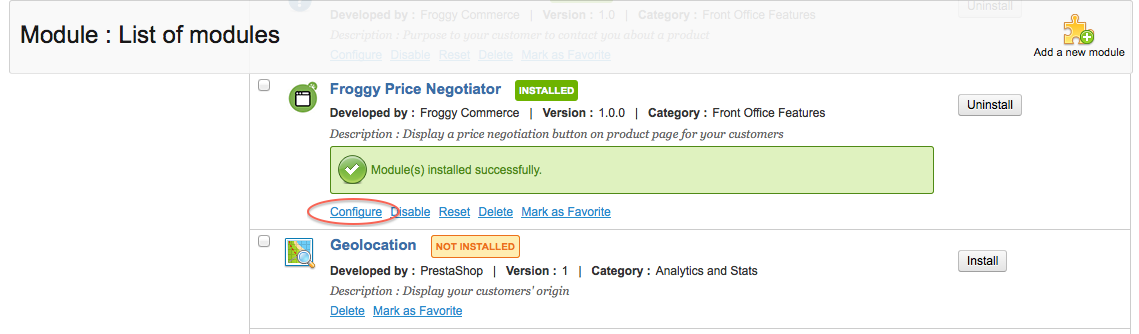
Once you will have clicked on the “Install” button, a confirmation message “Module Installed successfully” should appear. You can now click on the “configure” button.
1.1.2 Update on PrestaShop 1.4
To update your module, you just have to upload the zip file of the new version of the module.
So, first of all, download the last version of the module on our website froggy-commerce.com
Then, as for installation, connect to your PrestaShop Back Office.
Once connected, go to the “Modules” section.
You should have downloaded the updated file named “froggypricenegociator.zip”. You will have to upload it in your module section. To do so, click on the “Add a new module” button.
A new tab should have appeared, click on the “browse” button.
Then select the file “froggypricenegociator.zip” and click on “open”.
And finally, click on the button “Upload this module”.
A confirmation message “Module downloaded successfully” should appear.
Your module has been updated!
1.2.1 Installation on PrestaShop 1.5
First, connect to your PrestaShop Back Office.

Once connected, go to the “Modules” section.
We provided you a file named “froggypricenegociator.zip”. You will have to upload it in your module section. To do so, click on the “Add a new module” button.

A new tab should have appeared, click on the “browse” button.
Then select the file “froggypricenegociator.zip” and click on “open”.
And finally, click on the button “Upload this module”.
Your browser should scroll automatically to the new module added, and you should see it at the top of your screen. Now, you can click on the “Install” button.
Once you will have clicked on the “Install” button, a confirmation message “Module Installed successfully” should appear. You can now click on the “configure” button (on some versions of PrestaShop you will be directly redirected to the module configuration just after installation).
1.2.2 Update on PrestaShop 1.5
To update your module, you just have to upload the zip file of the new version of the module.
So, first of all, download the last version of the module on our website froggy-commerce.com
Then, as for installation, connect to your PrestaShop Back Office.
Once connected, go to the “Modules” section.
You should have downloaded the updated file named “froggypricenegociator.zip”. You will have to upload it in your module section. To do so, click on the “Add a new module” button.
A new tab should have appeared, click on the “browse” button.
Then select the file “froggypricenegociator.zip” and click on “open”.
And finally, click on the button “Upload this module”.
Your browser should scroll automatically to the new module added, and you should see it at the top of your screen. You DO NOT uninstall / reinstall your module.
Your module has been updated!
1.3.1 Installation on PrestaShop 1.6
First, connect to your PrestaShop Back Office.
Once connected, go to the “Modules” section.

We provided you a file named “froggypricenegociator.zip”. You will have to upload it in your module section. To do so, click on the “Add a new module” button.

A new tab should have appeared, click on the “browse” button.
Then select the file “froggypricenegociator.zip” and click on “open”.
And finally, click on the button “Upload this module”.

A confirmation message will appear.
At last, write "Froggy" in the search field, all Froggy modules will appear. Then click on the "install" button of the module you just uploaded. You will be automatically redirected to the module configuration page.
1.3.2 Update on PrestaShop 1.6
To update your module, you just have to upload the zip file of the new version of the module.
So, first of all, download the last version of the module on our website froggy-commerce.com
Then, as for installation, connect to your PrestaShop Back Office.
Once connected, go to the “Modules” section.
You should have downloaded the updated file named “froggypricenegociator.zip”. You will have to upload it in your module section. To do so, click on the “Add a new module” button.
A new tab should have appeared, click on the “browse” button.
Then select the file “froggypricenegociator.zip” and click on “open”.
And finally, click on the button “Upload this module”.
A confirmation message will appear.
Your module has been updated!
Once you clicked on the “configure” button, you should see this screen:
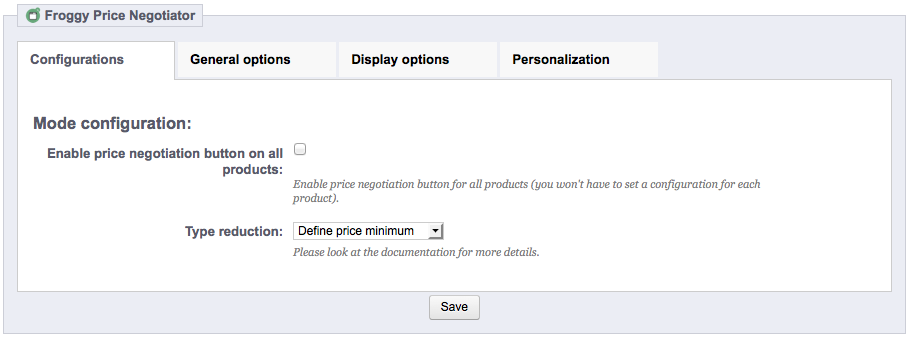
The principle of this module is simple: define a minimum sell price for your products in order to allow a negociation.
If you check the option "Enable price negotiation on all products", a new field will appear and you will be able to define a general room of negotiation in percent for your products.
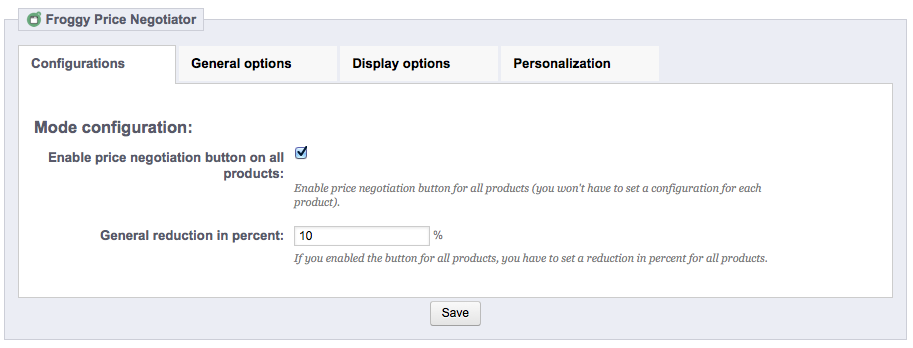
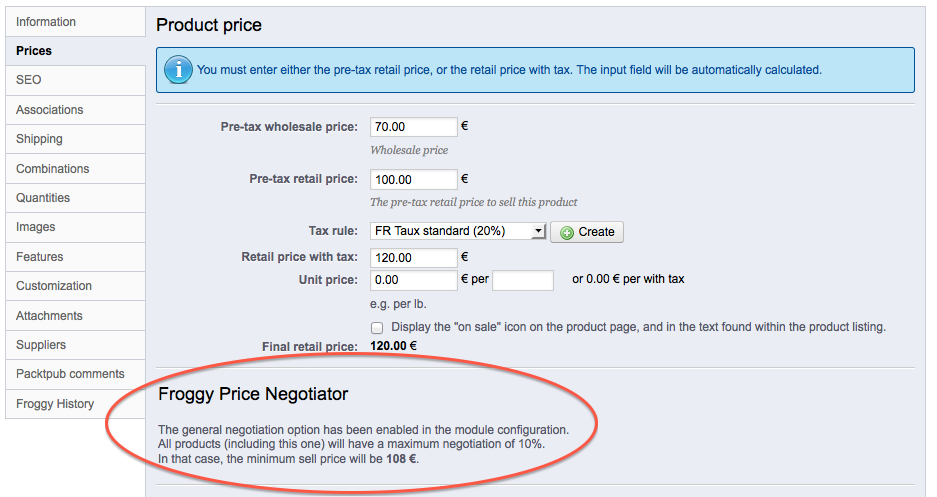
In our example, we fill 10%. It means that, in the worst case scenario, if a customer tries to negotiate one of your products, he won't have more than 10% reduction on it.
If you go to the "Prices" tab of one your product, you will have the minimum price defined.
If you do not check the option "Enable price negotiation on all products", you have to set the "Reduction type".

You can either define your room of negotiation in percent or define a minimum sell price directly.
If you define it in percent, the minimum sell price of your product will be dynamic (in case of price changes or promotions).
Once you have chosen your configuration, go to the "Prices" tab of one your products.
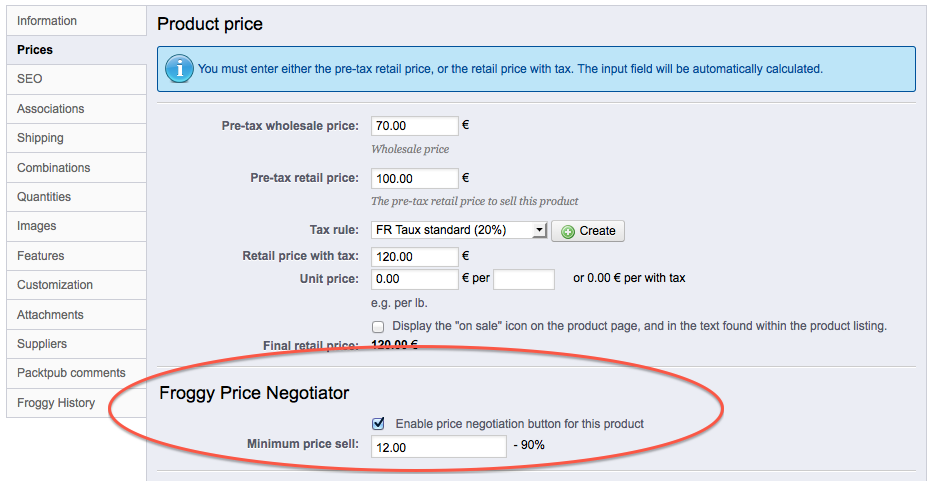
You can enable the price negotiation by checking the option "Enable price negotiation button for this product".
Then define a minimum price sell (or a maximum percent reduction depending of your module configuration).
Since a product combination can have a different price, you can also define a minimum price sell by combination.
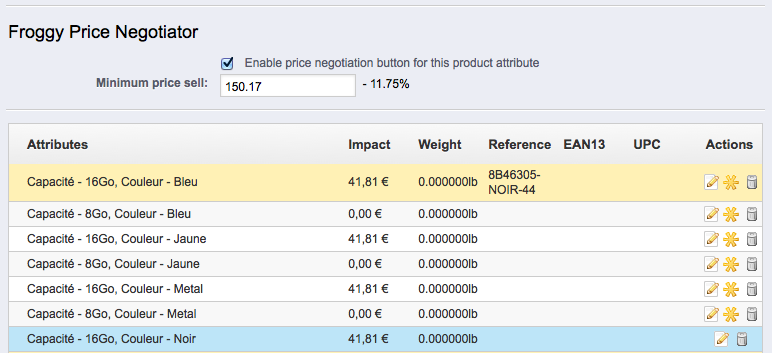
You have to define a configuration for the product before defining it for a combination.
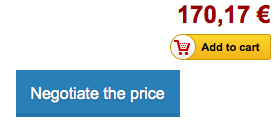
When a customer will arrive on a product page, he will see a button "Negotiate the price" near the "Add to cart" button.
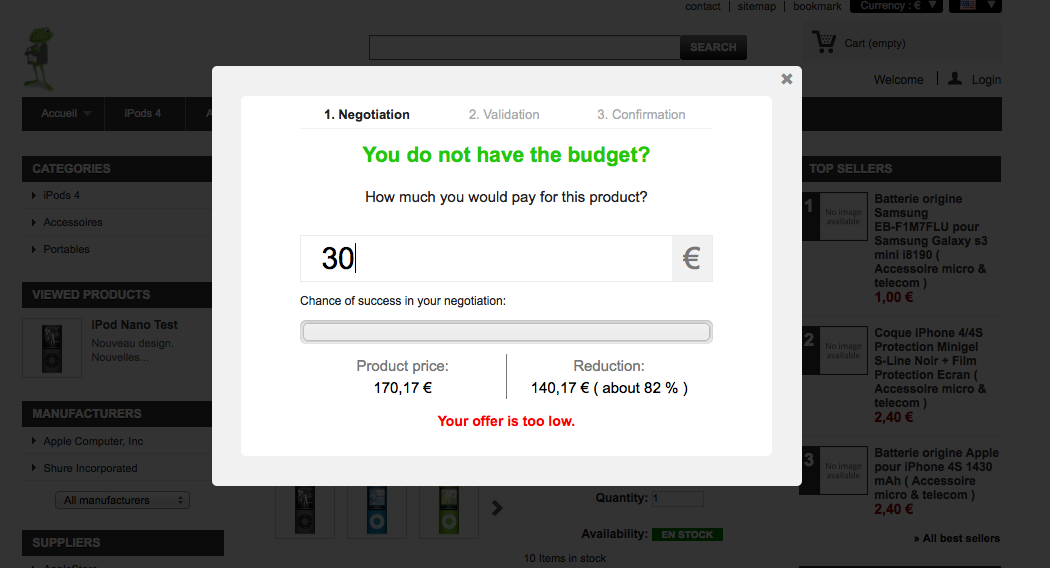
If he clicks on this button, a pop-in will appear asking him how much he would accept to pay for this product.
If the offer is too low (under 90% of the minimum price sell), an error message will appear.
If the offer is acceptable, a button "Submit my offer" will appear.
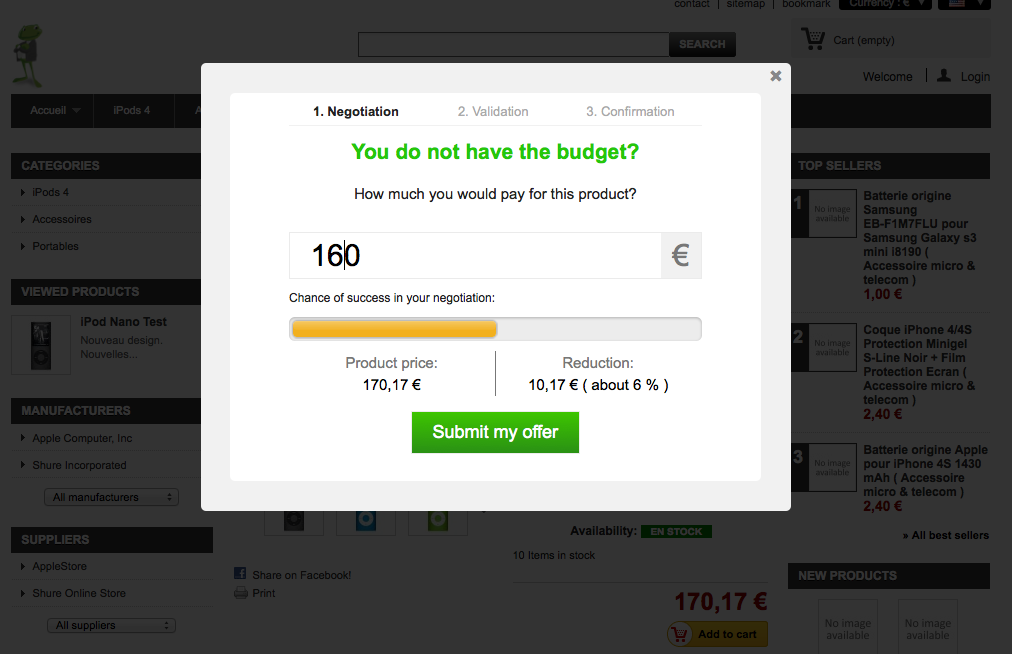
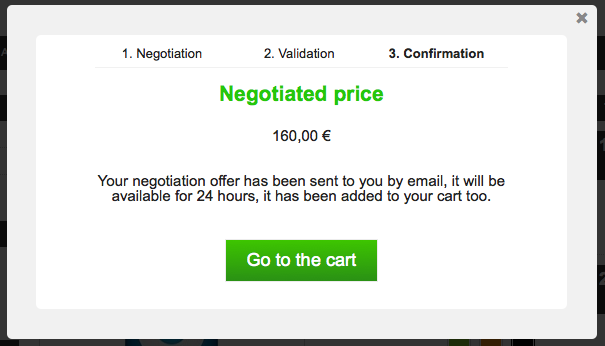
If the offer submitted is between 90% and 100% of the minimum sell price, the customer will be notified that his offer was too low. The module will automatically offer to buy the product to the minimum sell price.
If the offer submitted is superior to the minimum sell price, the offer will be accepted.
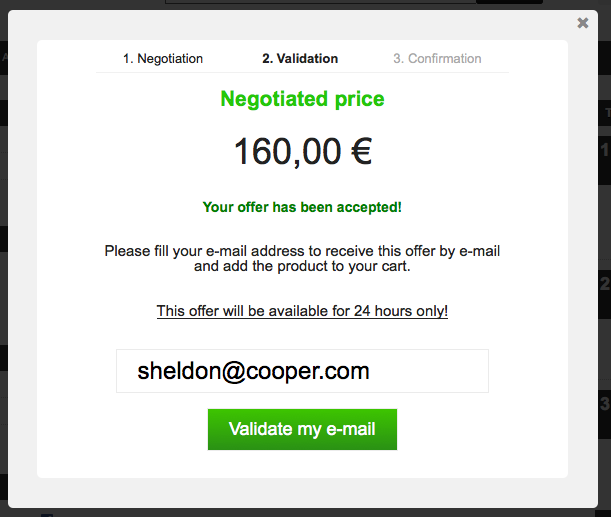
The customer will have a to fill up his email address to get the reduction. He will then receive a reminder with the accepted offer and the product and reduction will be added to the cart.
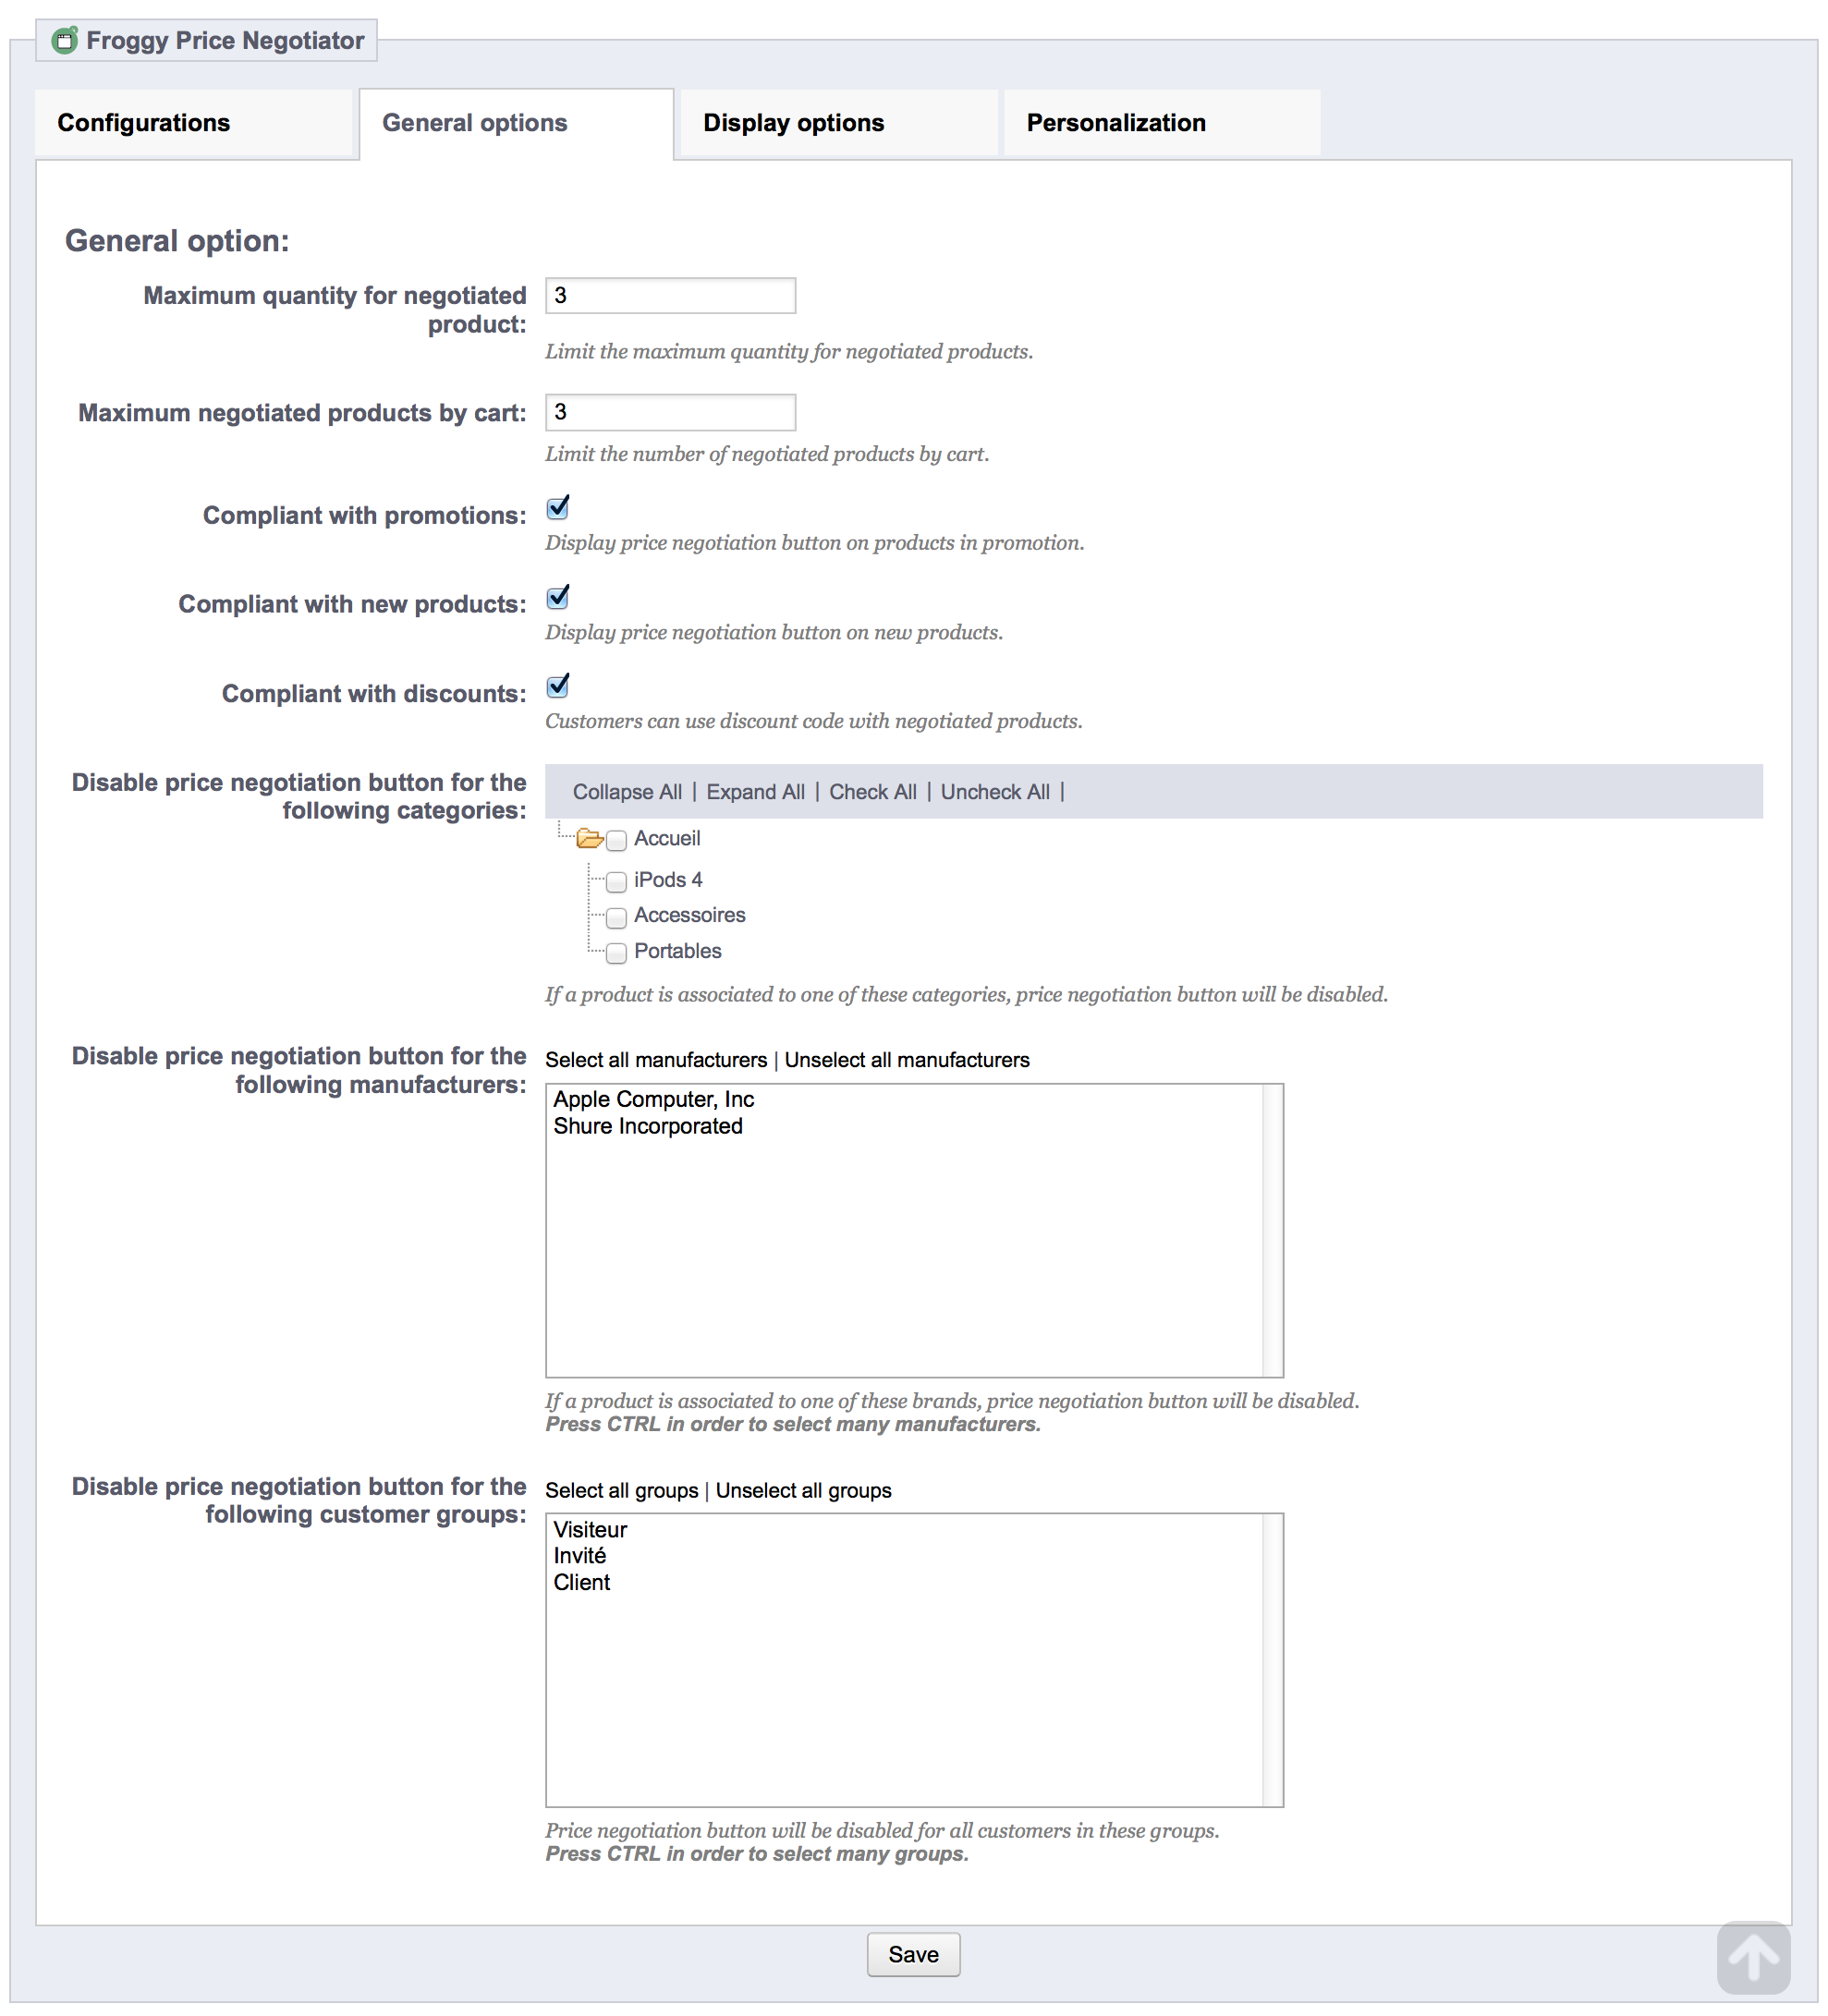
As you might have noticed, there are several tabs on the module configuration. These are optional configurations.
In this tab, you will be able to configure the following options:
- Maximum quantity for negotiated products: You can limit the quantity for negotiated products. For example, if you set the limit to 5 and that the customer wants a quantity of 6 for a negotiated product, the sixth product will be sold at the original price.
- Maximum negotiated products by cart: You can limit the number of different negotiated products by cart. For example, if you set the limit to 5 and that the customer negotiate 6 different products. The last one will be sold to the original price.
- Compliant with promotions: If you set this option to no, products in promotions won't be negotiable.
- Compliant with new products: If you set this option to no, new products won't be negotiable.
- Compliant with discounts: If you set this option to no, if a negotiated product is added to the cart, the customer won't be able to add a discount code.
- Disable price negotiation for the following categories: If a product is associated to one of the selected categories, it won't be negotiable.
- Disable price negotiation for the following manufacturers: If a product is associated to one of the selected manufacturers, it won't be negotiable.
- Disable price negotiation for the following customer groups: If a customer is associated to one of the selected customer groups, he won't be able to negotiate products.
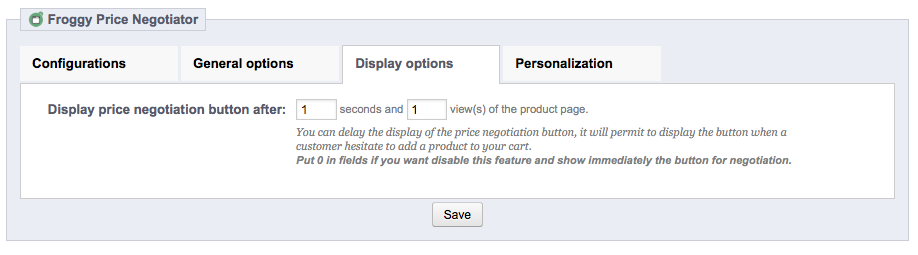
In this tab, you will be able to define when the button is displayed.
You can configure it to appear on the X views of the product page and / or after X seconds.
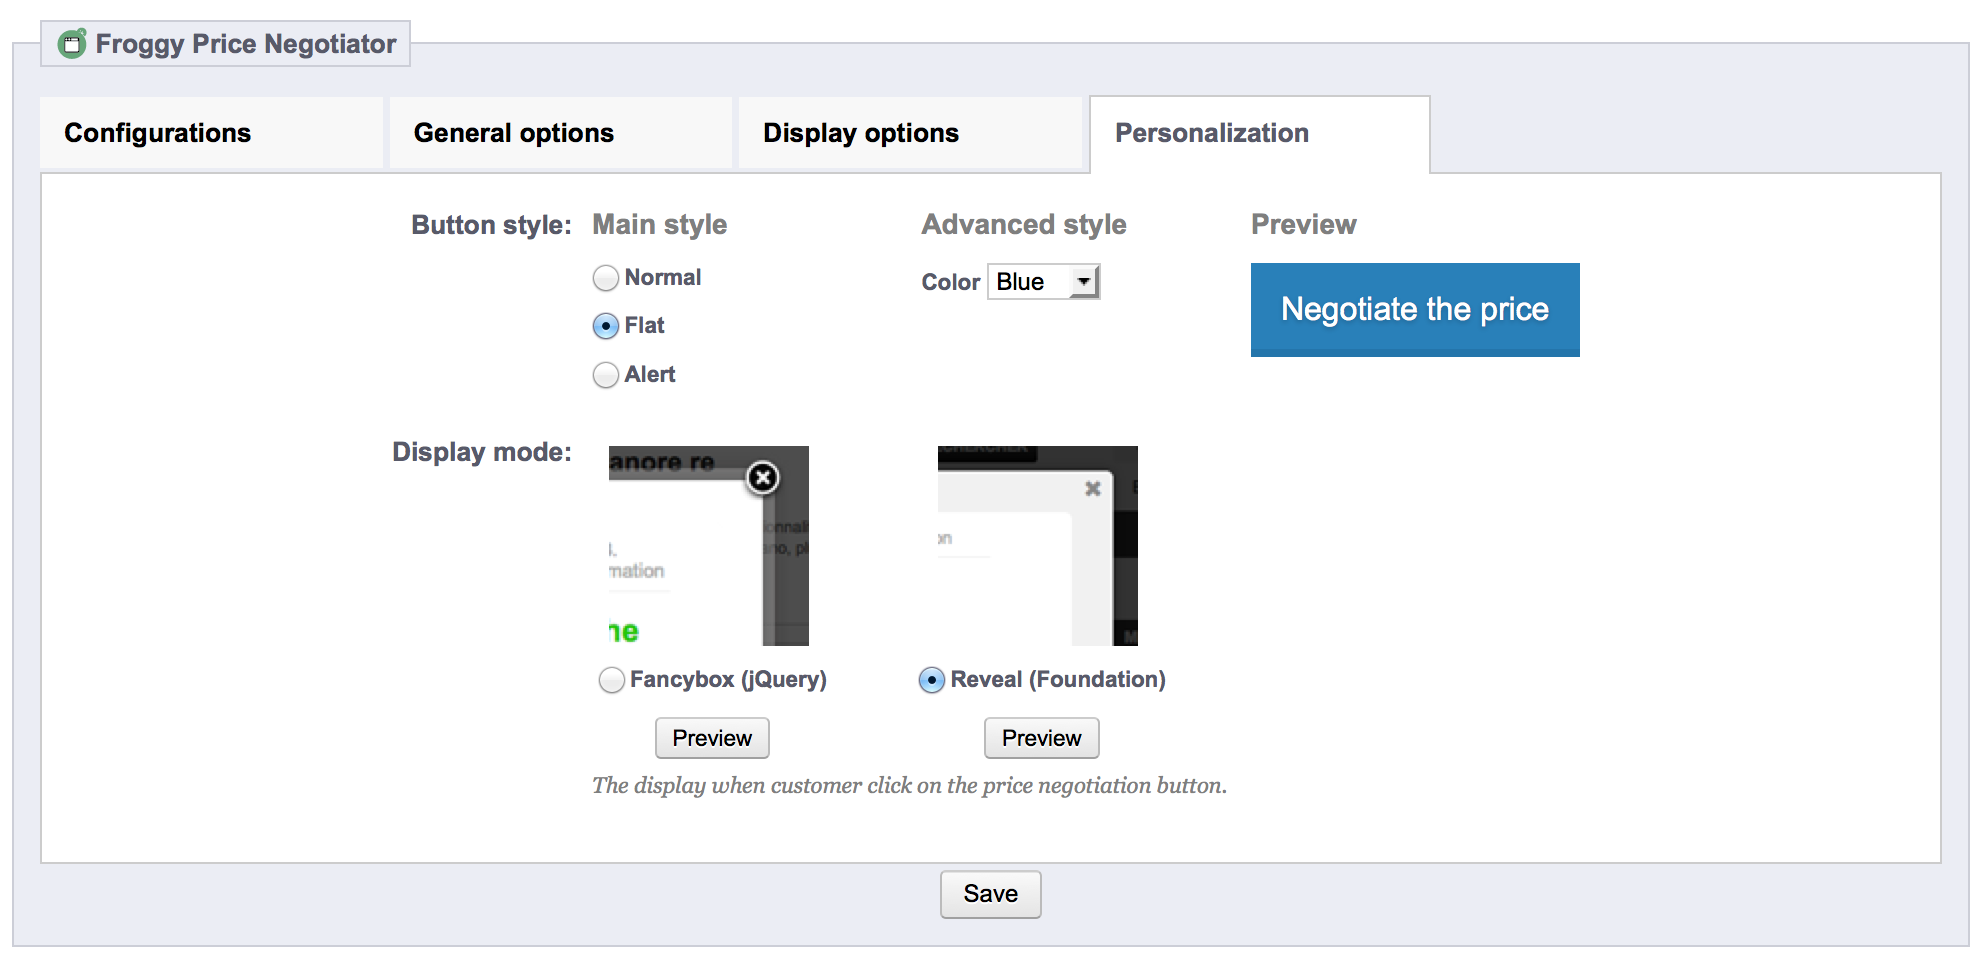
In this tab, you will be able to custom the negotiator button appearance.
Two options are customizables: the button and the popin window.
You can choose the style ("normal", "flat" or "alert") and color for the button. A preview is displayed in real time so you will be able to see what the button will look like before validating the configuration.
You can choose the type of popin, either the traditionnal Fancybox of PrestaShop or Reveal which has a different animation than Fancybox. For both popin, a preview is available.